Well it’s official, I now have a piece of NFT art, created by me, listed for sale on OpenSea.io the largest NFT marketplace. The whole process has been fascinating and more than anything, it has been fun to get in touch with my artistic side more. Before I dive into the technical details I’ll share a bit more about the art I created and why it’s meaningful to me.
Since I was a little kid my family and I would go to Yosemite every year, we did it for fifteen years and honestly it was probably my favorite week of the year. If you’ve been to Yosemite before you know it is absolutely beautiful and unique in so many ways. I still try to go to Yosemite has much as a I can and over the last couple of years my friends and I have been doing a really fun snow backpacking trip out to Dewey Point in Yosemite.
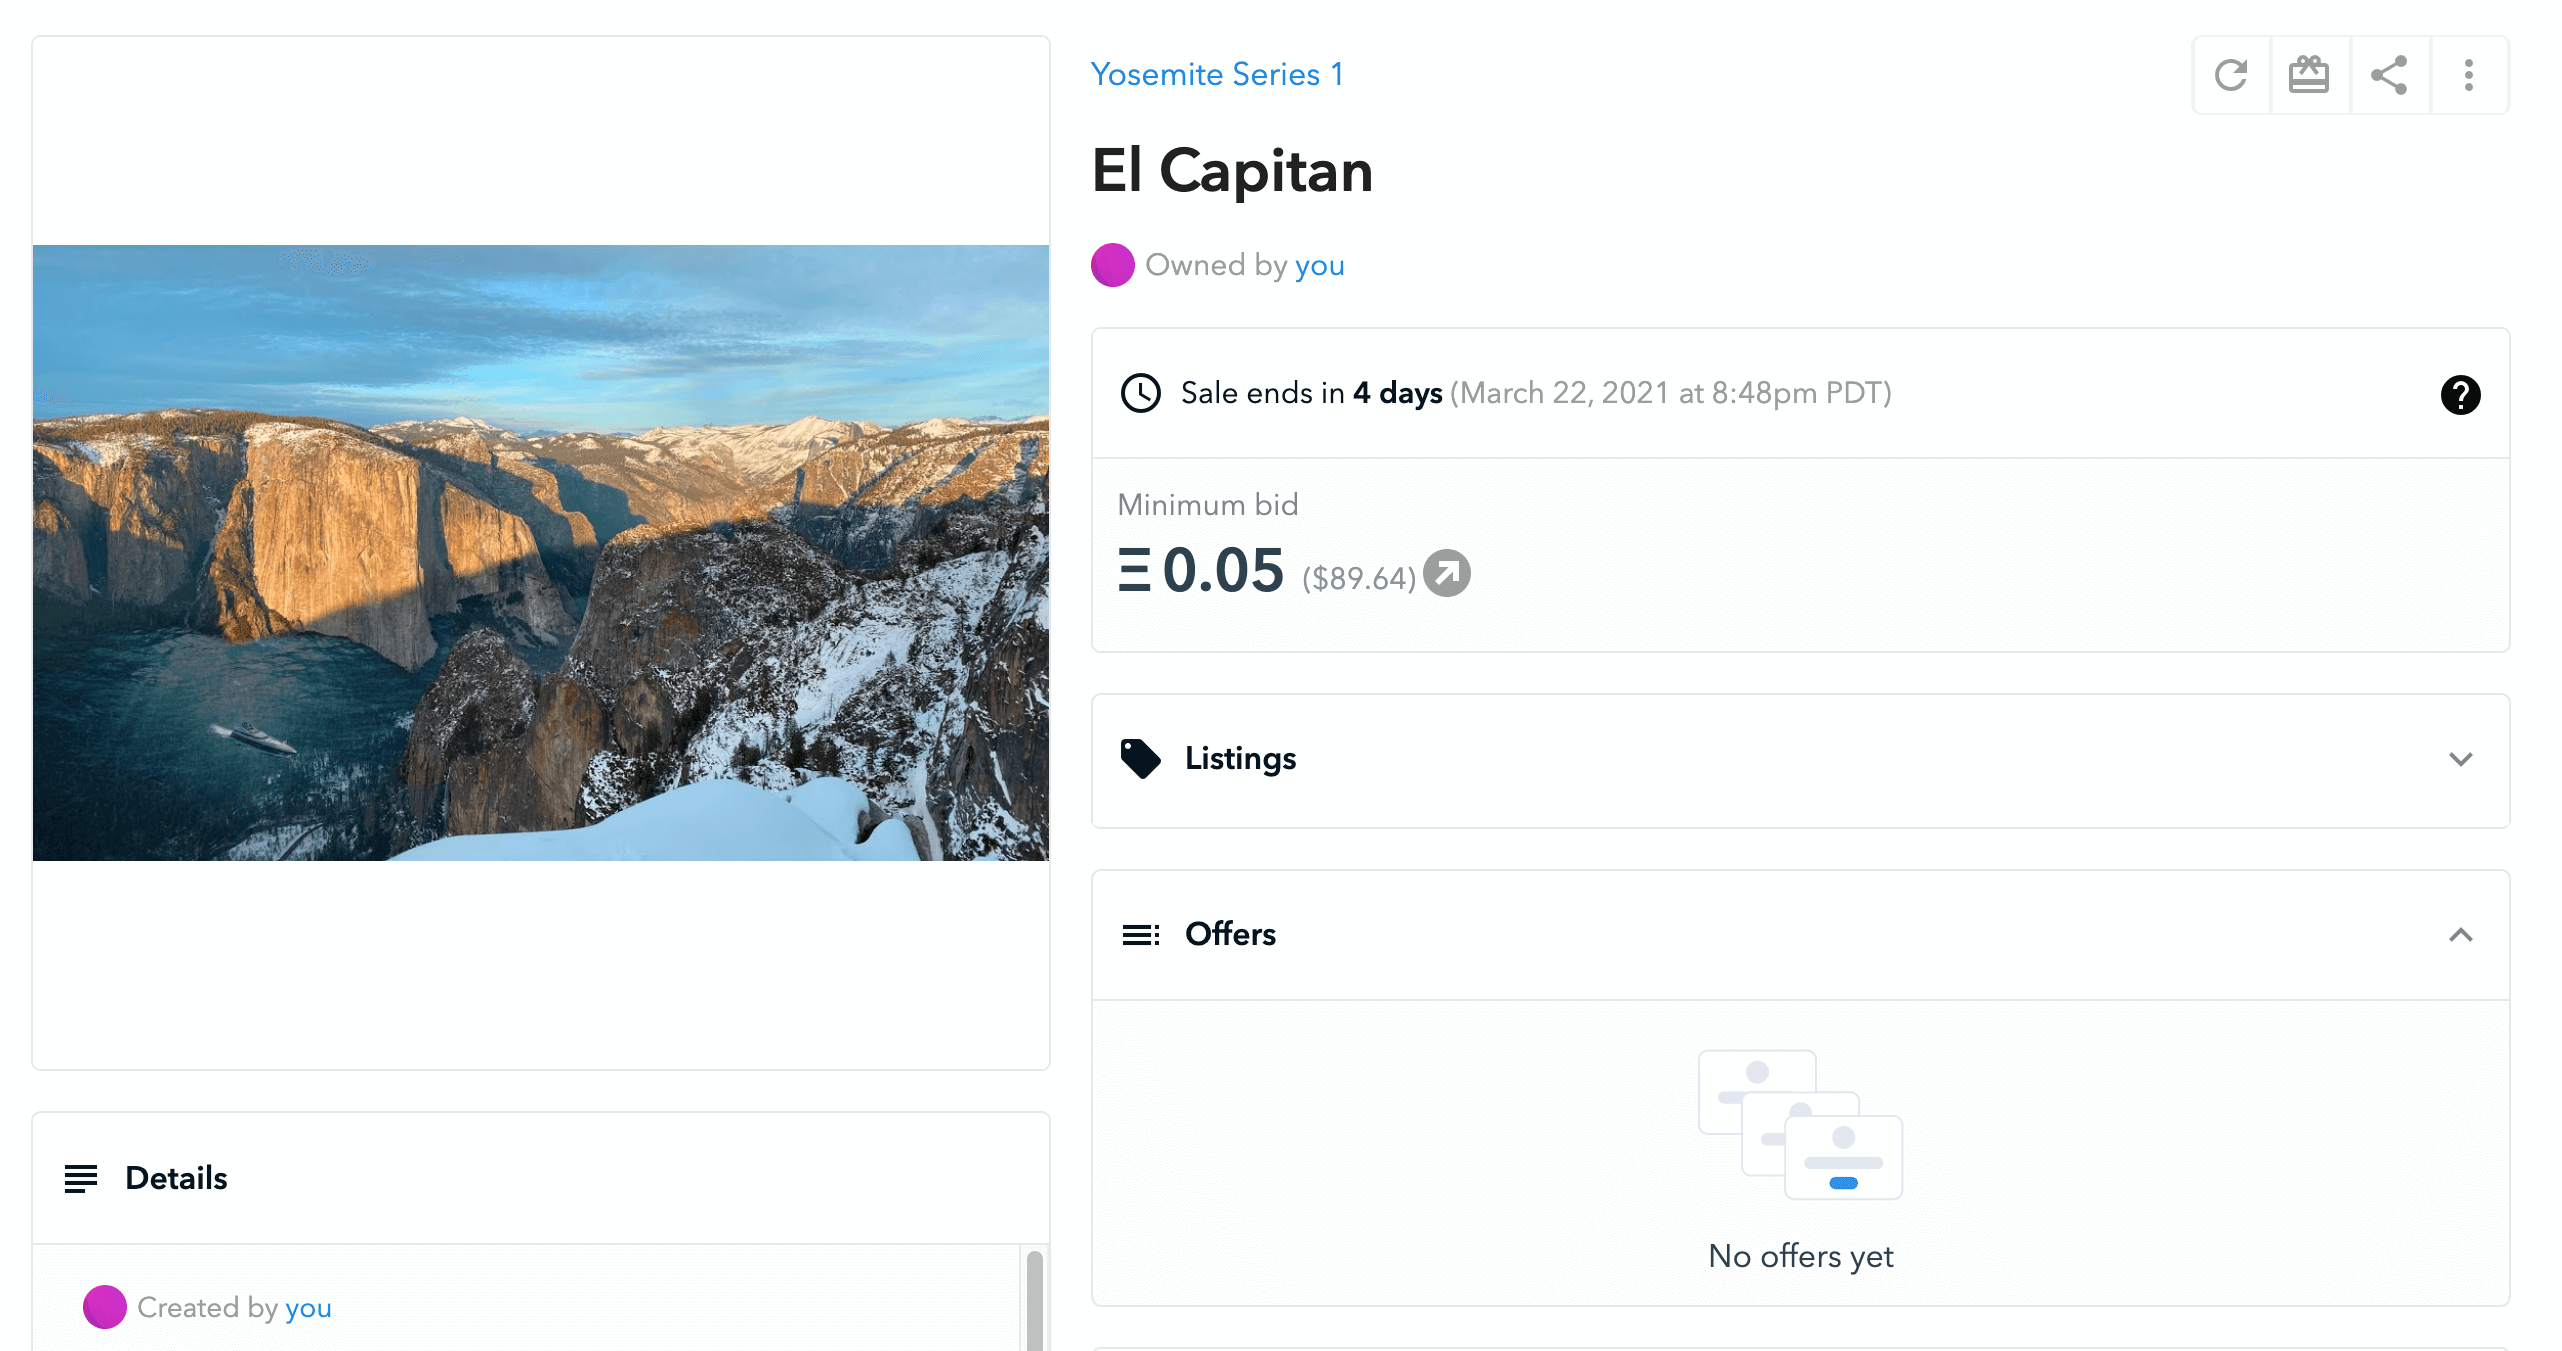
What makes Dewey Point so special is the view you get of El Capitan, one of the most distinct mountains in Yosemite. And El Cap, at sunset from Dewey Point is absolutely magical. The problem is, it’s hard to get that magic to translate when you look at a photograph, your mind just isn’t in the same mode that it’s in when you’re actually there.
So for my first piece of NFT art I thought, how can I make something that feels a bit surreal, that the mind knows isn’t real, so that it gets you into a little different headspace and through that maybe you can get a step closer to the magic you experience when you’re there. And thus my first piece of art was created, if you want to pause here and take a look at it on OpenSea.io feel free to:
Okay, so now for the question I know a lot of people have, how the heck do you actually create an NFT and list it for sale? The process was actually pretty simple so if you have three minutes, read on and you’ll know how to do it too!
Step 1: Create an OpenSea.io and MetaMask.io account
You will need an account with both OpenSea and MetaMask. OpenSea is the marketplace itself and MetaMask is the Ethereum wallet they play nicely with.
Step 2: Send some ETH to your MetaMask account
You’ll need to pay the listing fee (plus gas) and I usually just recommend people throw say $100 worth of ETH into their MetaMask account so they have some funds to play with. This will be more than enough to cover your first listing.
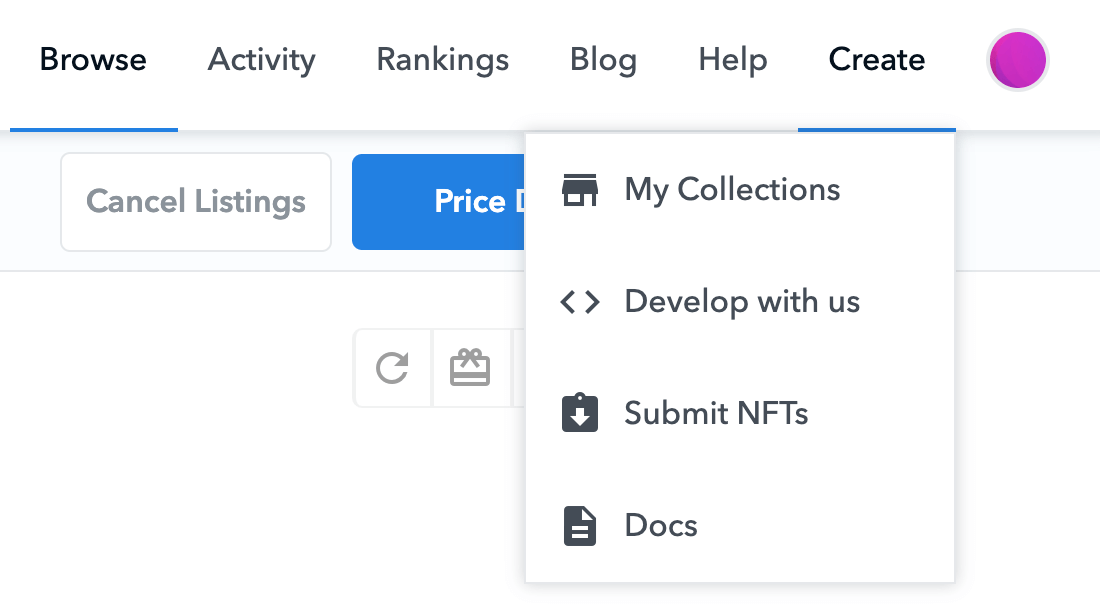
Step 3: Submit your NFT to OpenSea
Go up to the top menu (i.e. on the upper right of your screen) and click Create, then scroll down to Submit NFTs, here’s what it looks like:
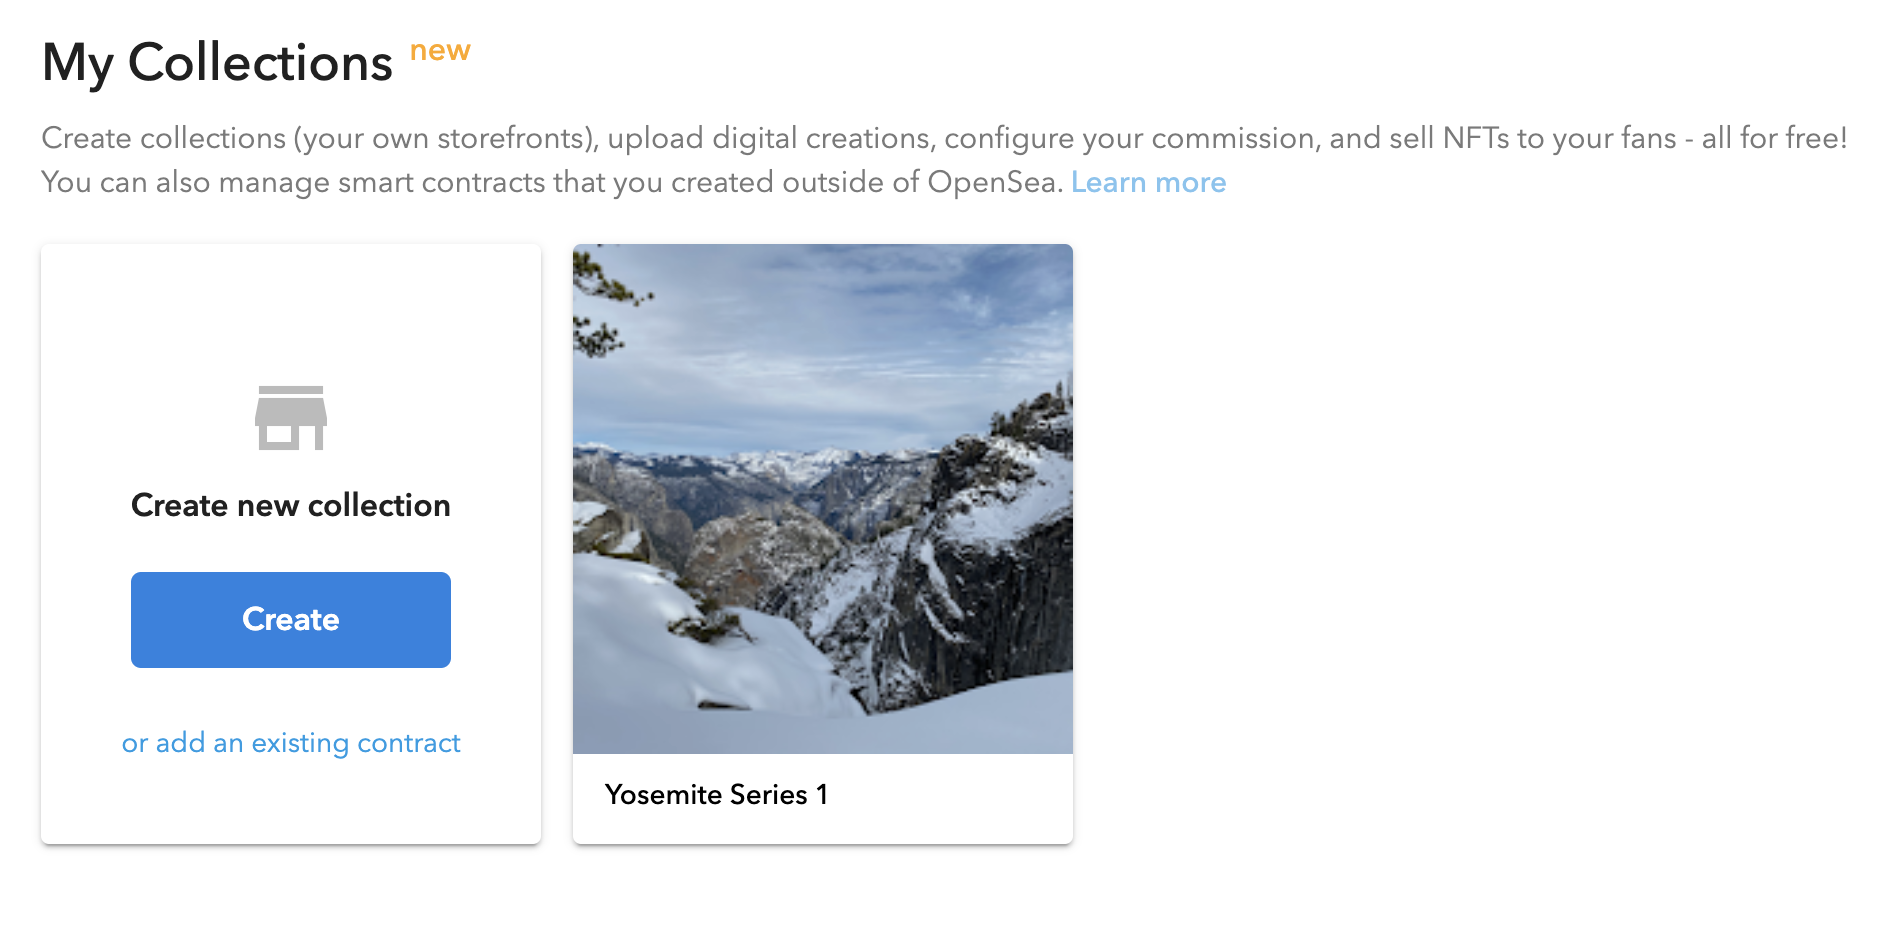
Step 4: Create your first collection
On the next screen you just click the blue “Create” button to create your first collection:
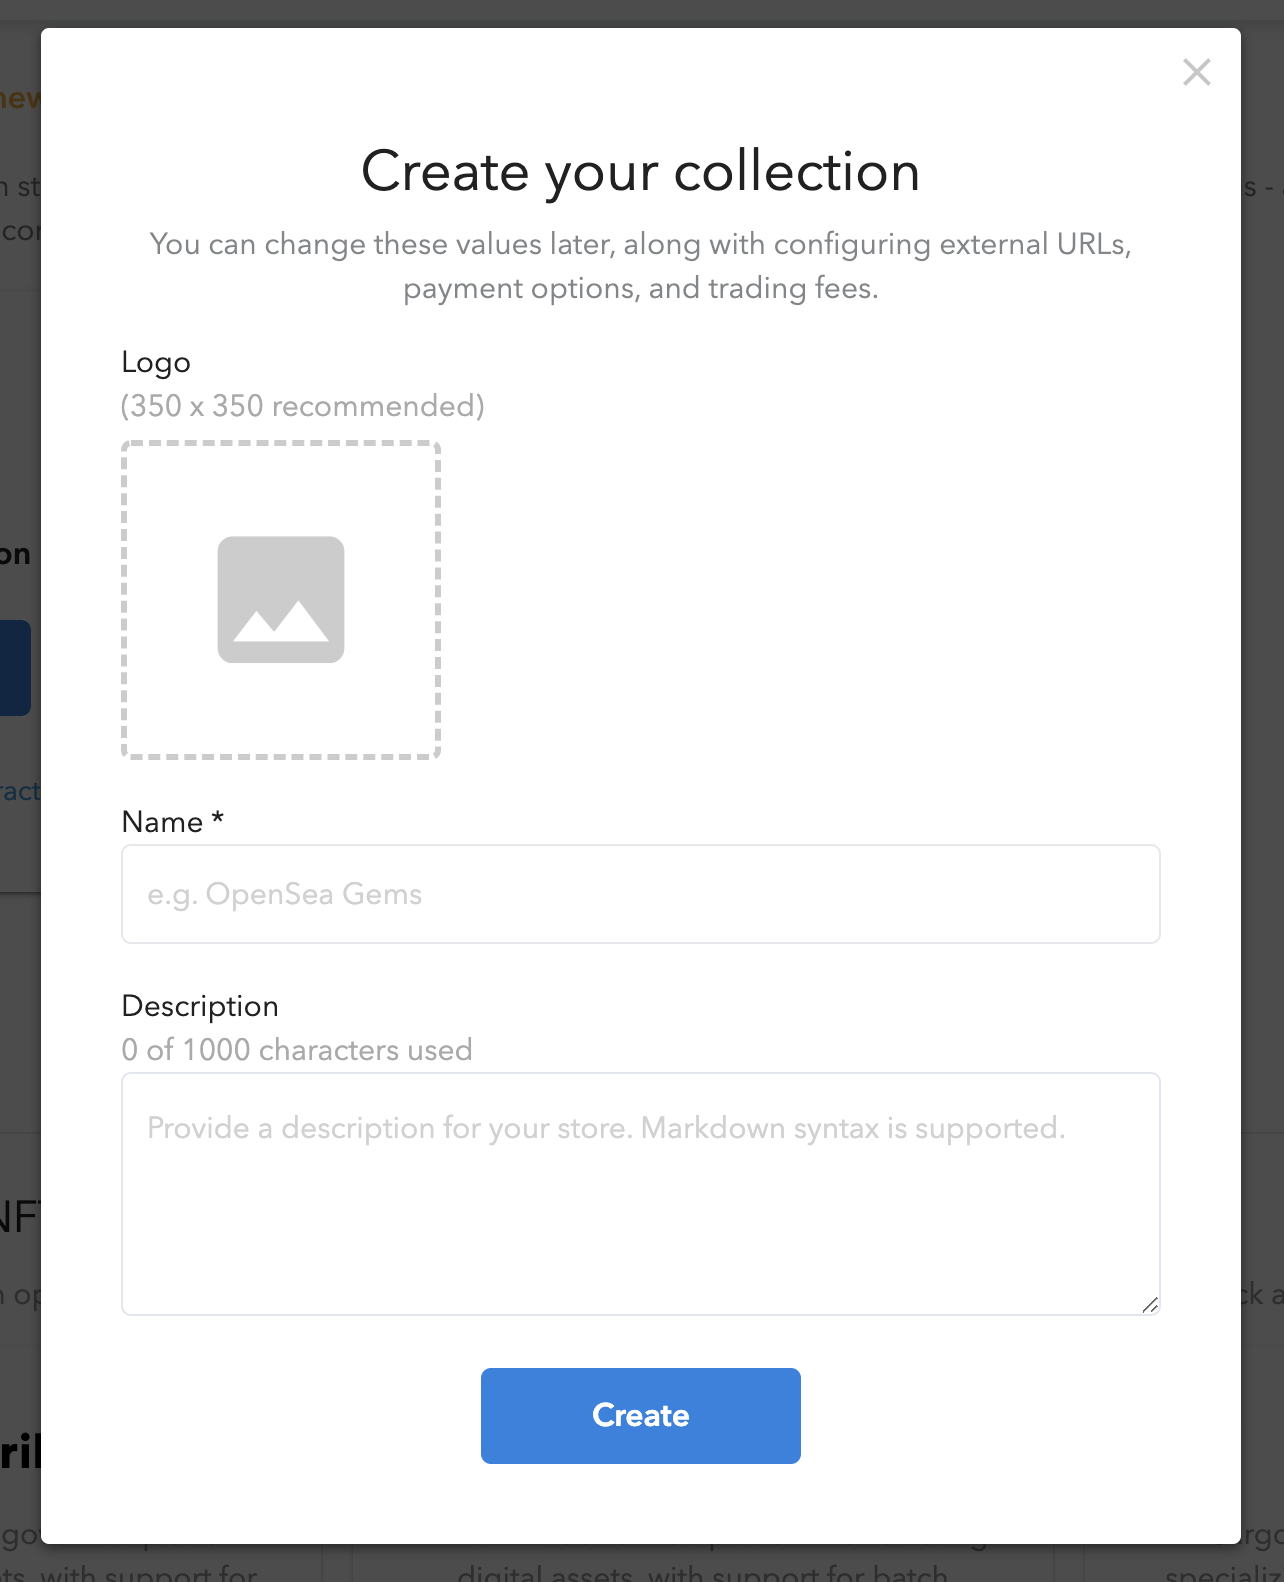
Step 5: Fill out a quick form about the collection you’re creating
Here’s what the form looks like:
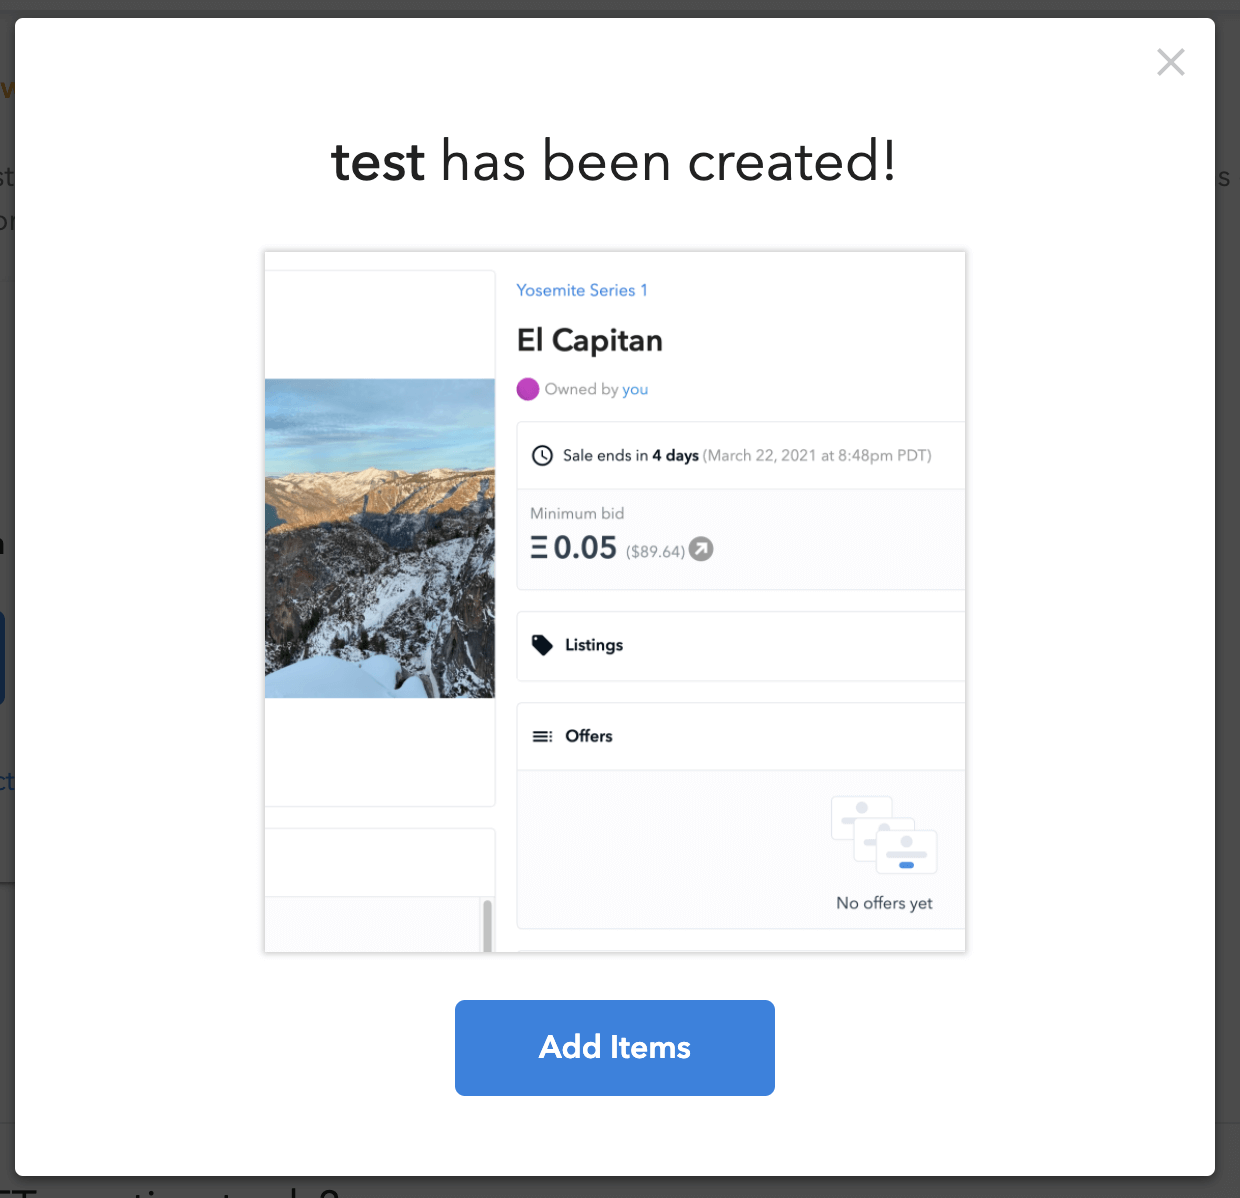
Step 6: Click “Add Items” to start adding items to your collection
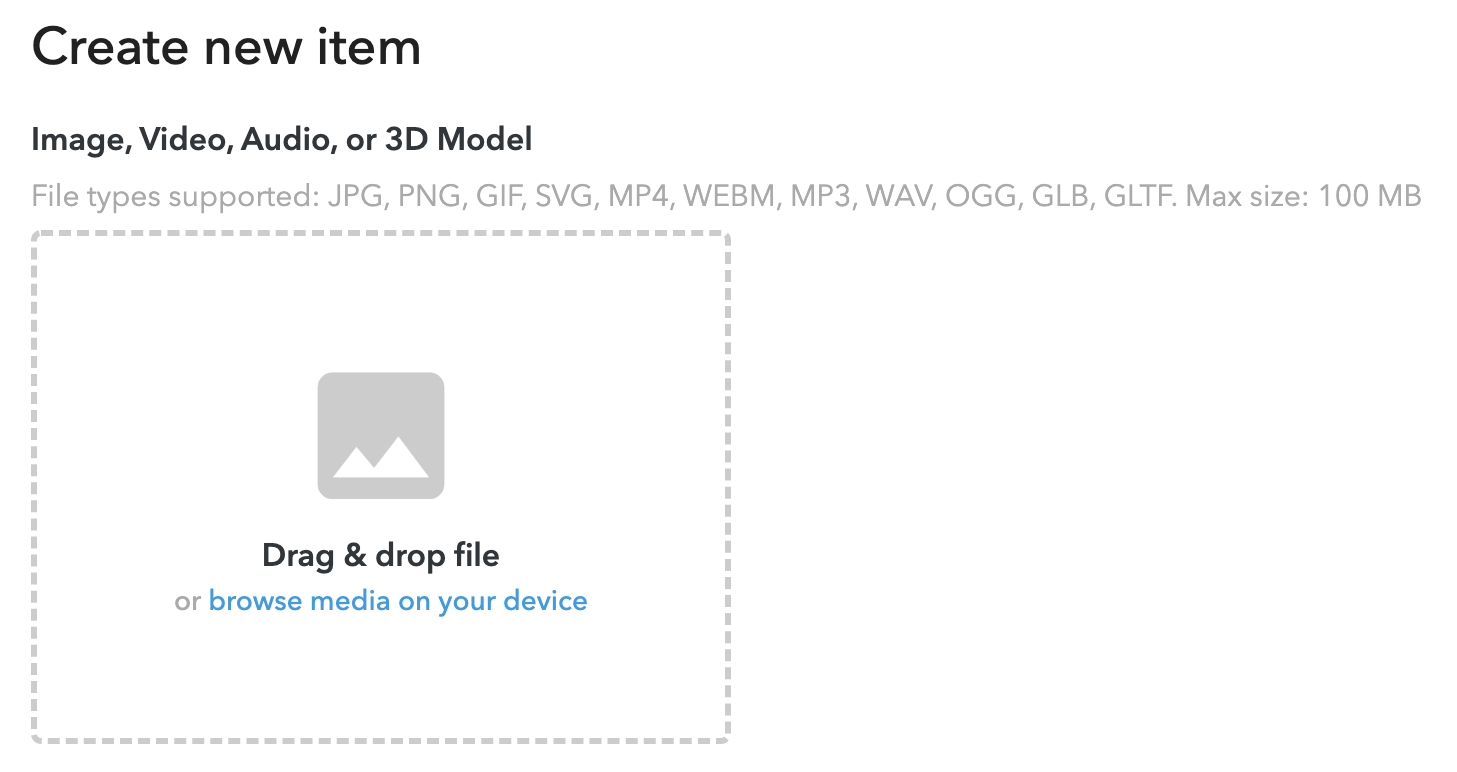
Step 7: Add the things you want to make NFTs of
To keep things simple I decided to start with a JPG, you could go nuts and jump in with an animated GIF, a video, really anything you want, you just need the digital file. Below you can see all the formats that OpenSea can handle:
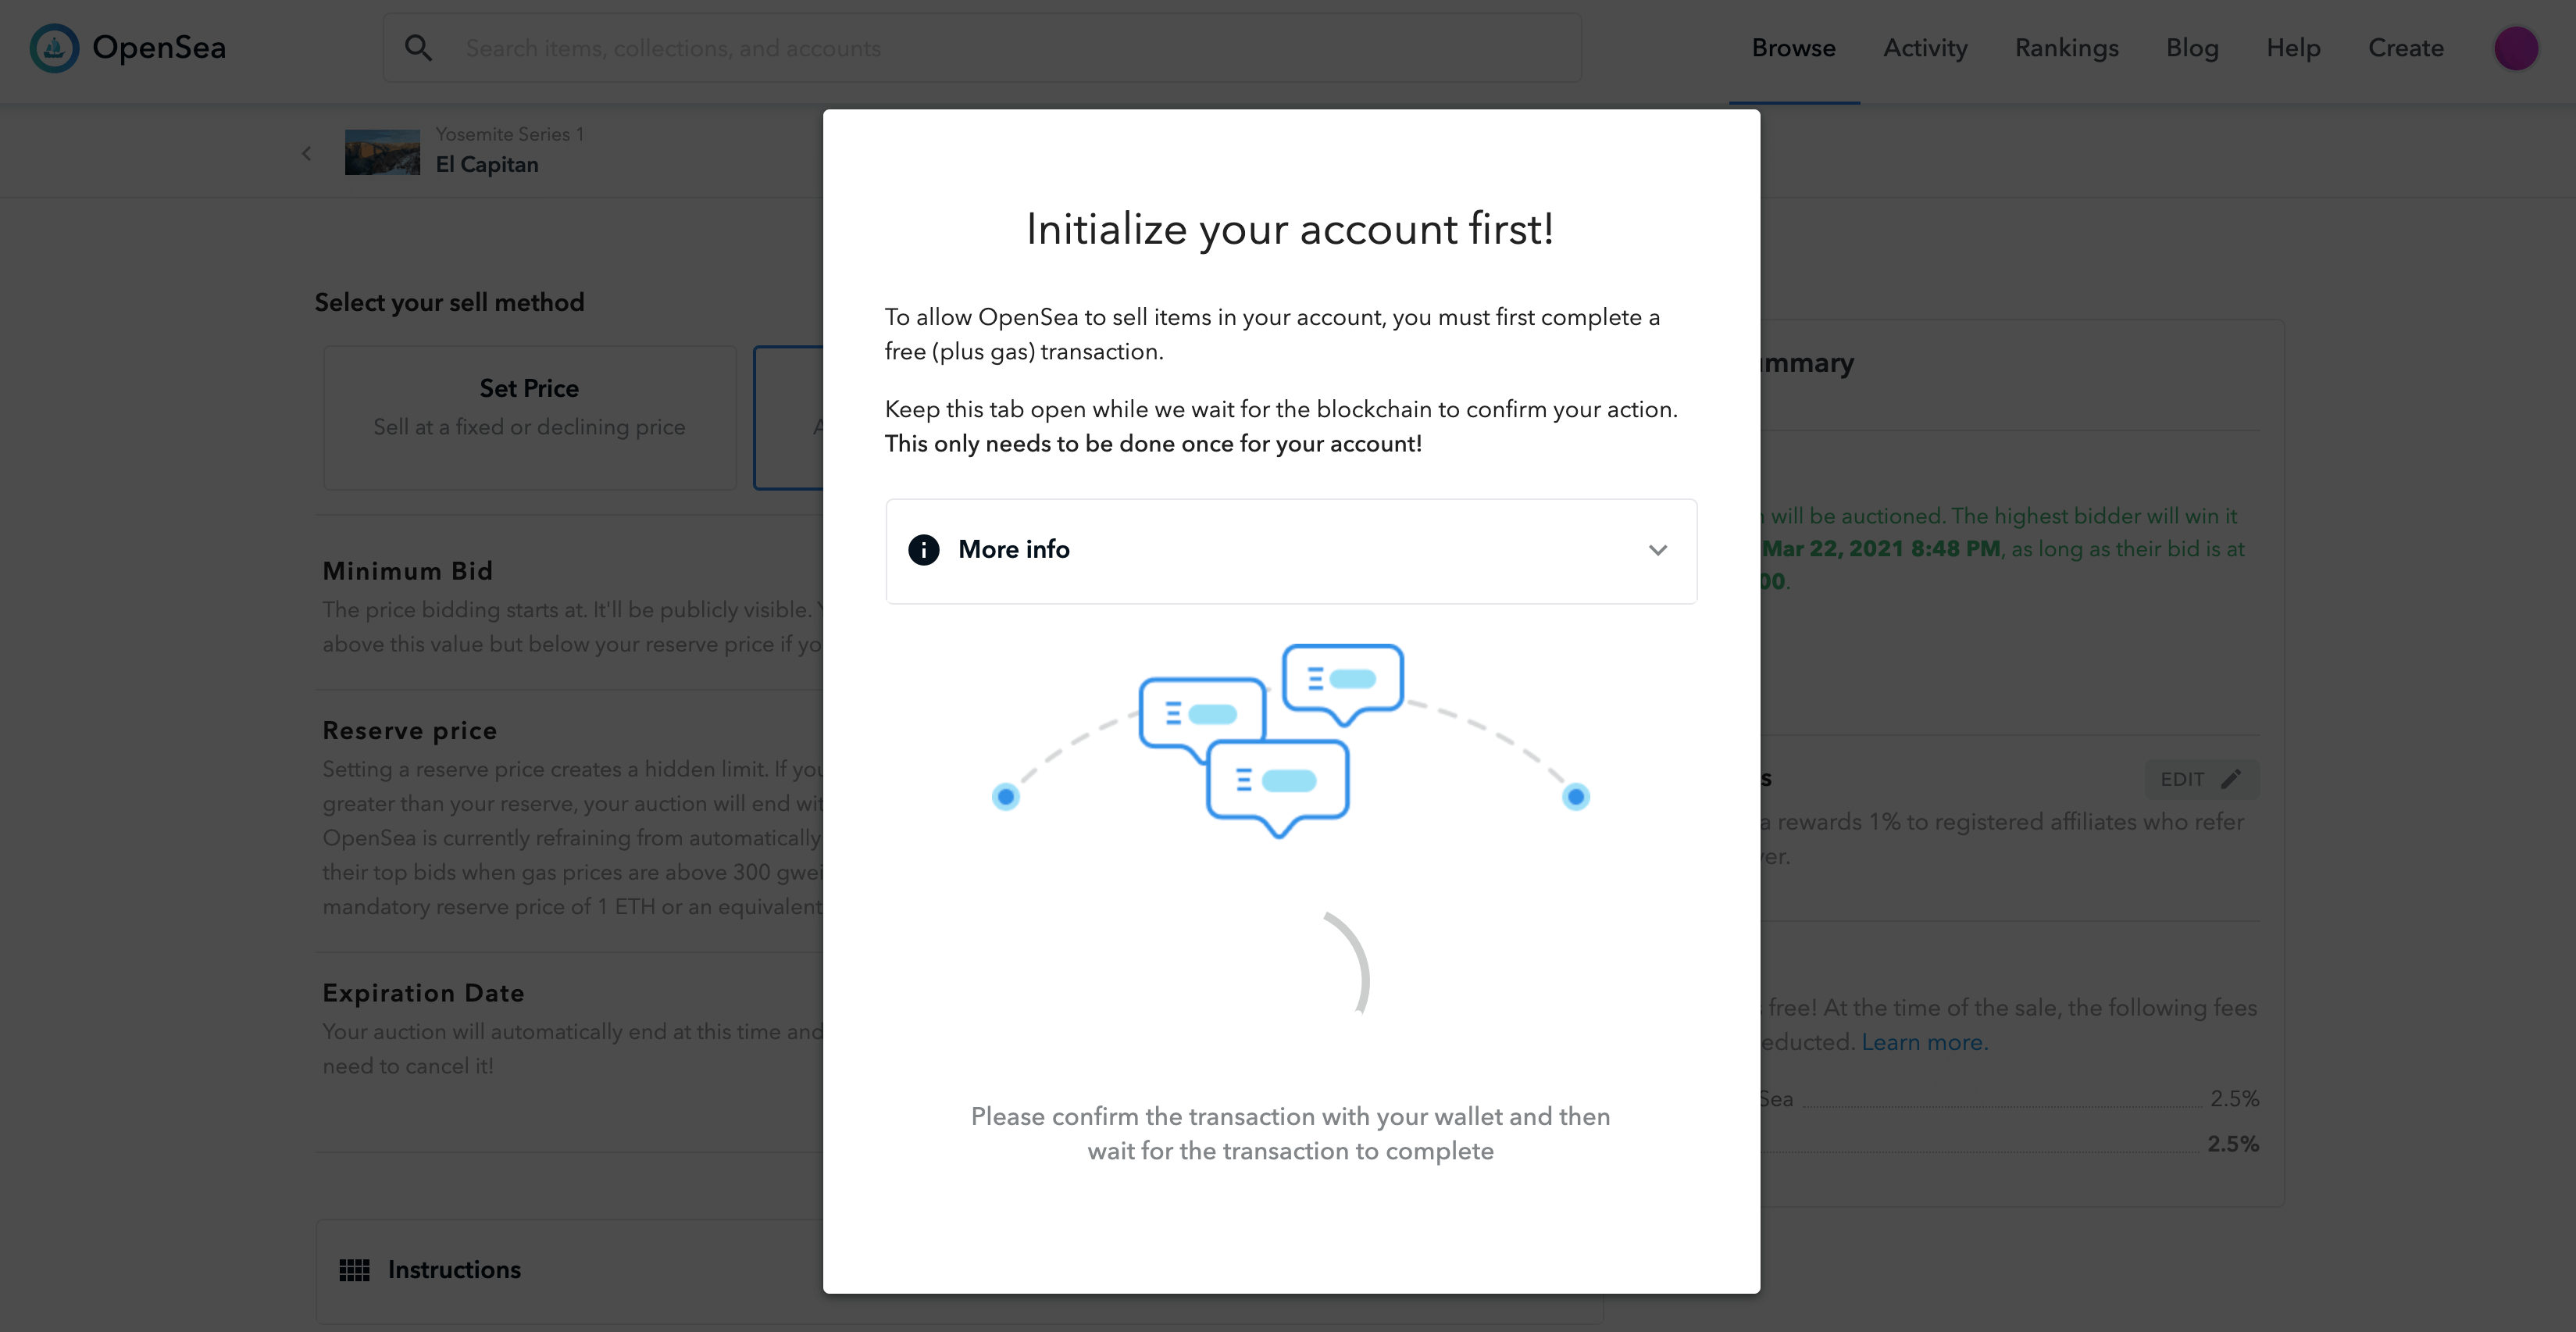
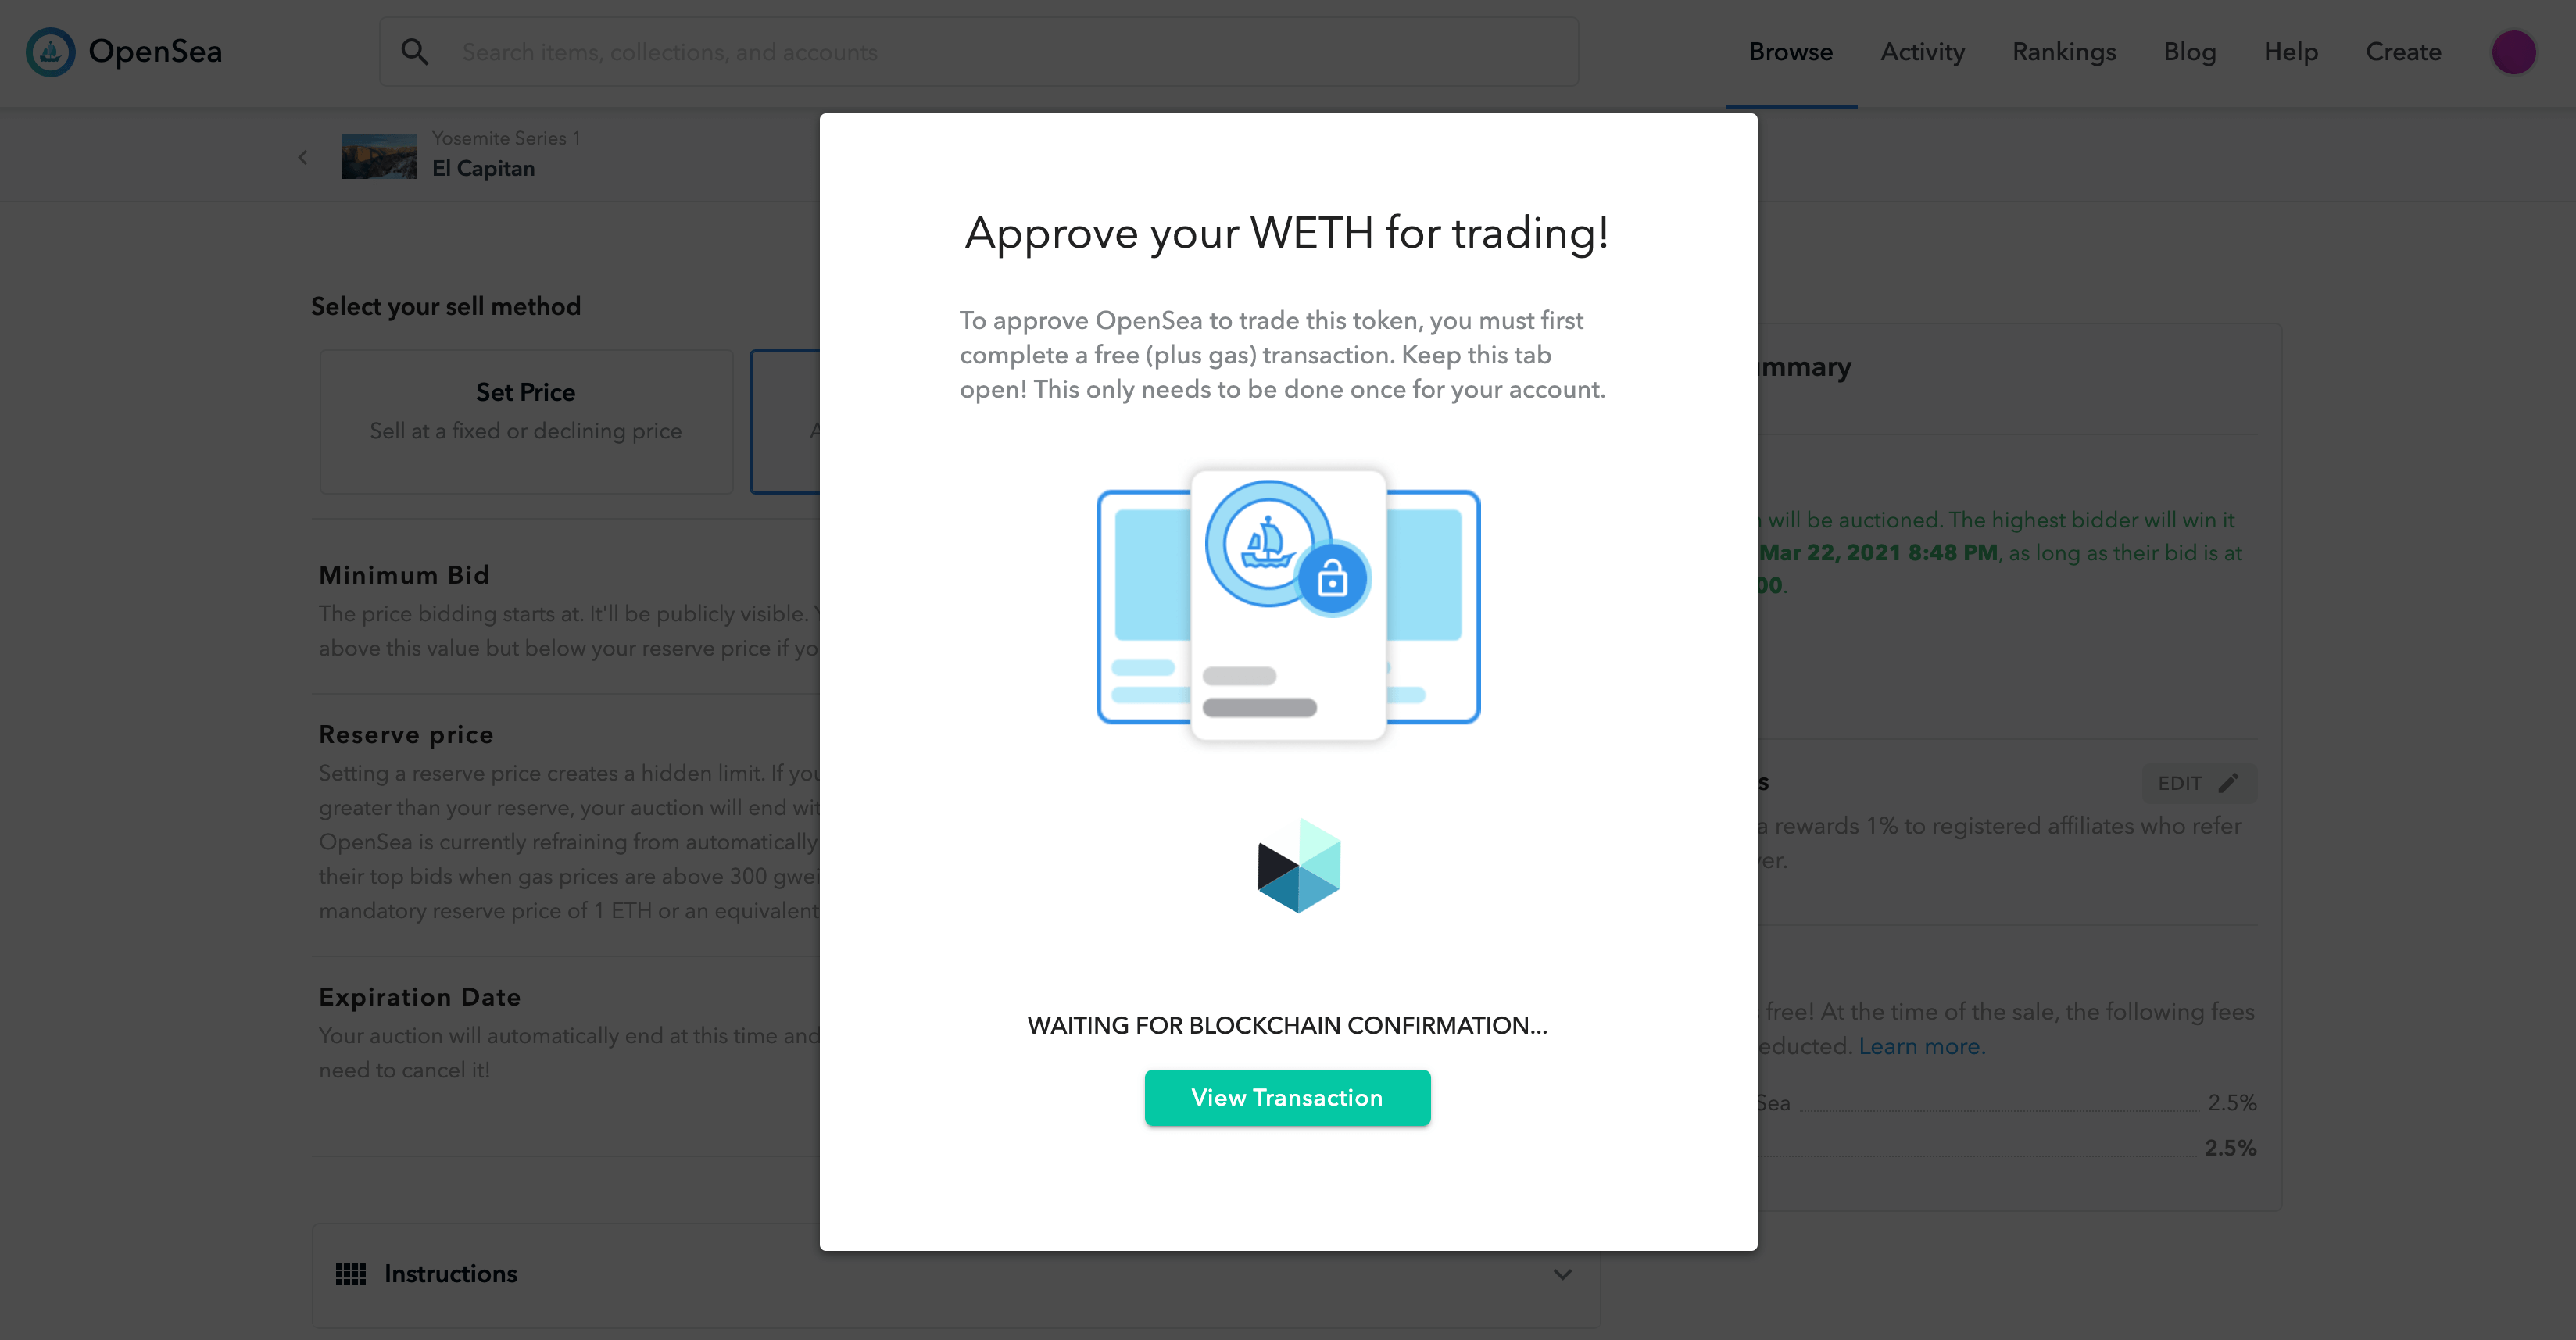
Step 8: Click Create and pay the listing fee (plus gas)
The next step is where the magic happens and your NFT gets added to the blockchain and available for purchase. You’ll go through an initialization step first:
And that’s it – you now have an NFT listed for sale. Not too bad right? Given that I just went through this process for the first time yesterday I should note I’m about as far from an expert as I can be. I’m having a blast learning and as always will share what I learn with all of you – thanks for reading!