Welcome to Part Three of my series on building a WordPress site in a weekend. If you missed the first two parts you can check them out below:
Part 1: Overview of the process, theme, and hosting provider
Part 2: Configuring Jetpack and Akismet
One element to this weekend build that makes it unique is that I built the site on a domain that already gets a fair amount of direct navigation (type-in) traffic. What’s cool about this is that instantly there’s already a steady flow of visitors coming to the site even before it starts ranking in search engines.
Note, I am not doing anything to monetize the site yet so I’m not converting that traffic to revenue. My goal was to build the site in a weekend getting the first three blog posts up, the initial pages live, and all the plugins setup on the backend to build a solid foundation.
In this article I will be talking about one of my favorite WordPress plugins, All-In-One-SEO-Pack, I know the name sounds a little goofy but trust me, it’s been a go-to for WordPress peeps for a long time.
While you can go nuts and configure a million different options in the All-In-One-SEO-Pack plugin, for a weekend website build I’m just doing the basics. With that here’s what I did.

First things first – I check the box to enable Canonical URLs. What the heck is that you ask? Here’s a good explanation from the SEO pro’s over at Moz:
A canonical tag (aka “rel canonical”) is a way of telling search engines that a specific URL represents the master copy of a page. Using the canonical tag prevents problems caused by identical or “duplicate” content appearing on multiple URLs. Practically speaking, the canonical tag tells search engines which version of a URL you want to appear in search results.(Source – Moz)
Next I setup the title and description for the Home Page and I keep “Use Static Front Page instead” disabled. Like I said earlier, I’m not an SEO expert so if you think I could do a better job with my title tag, let me know. If you want to learn more about how to make a good title tag, once again, I refer to my buddies over at Moz and this article on title tags and SEO.
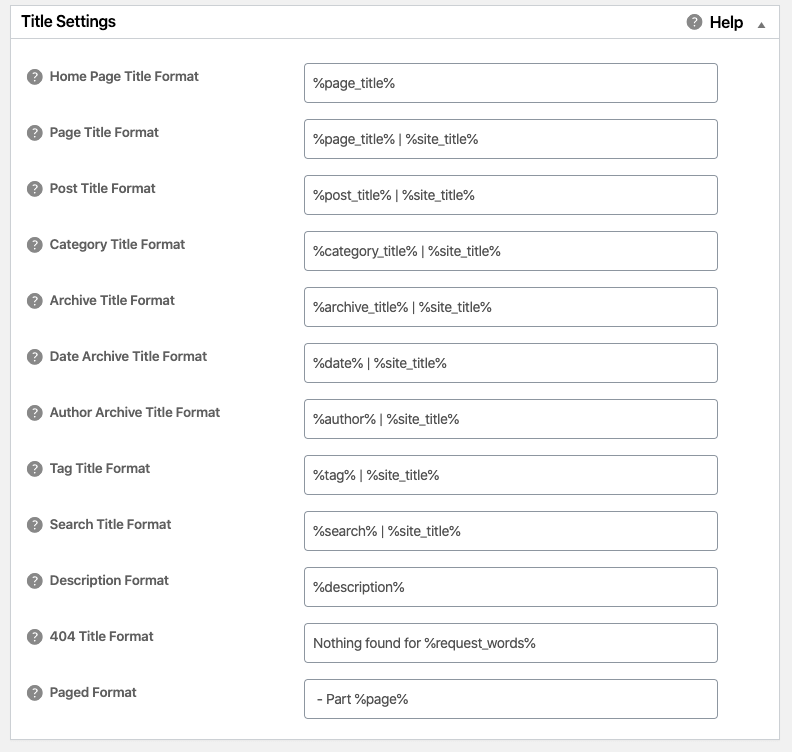
Speaking of title tags, All-In-One-SEO-Pack (jeez that takes a long time to write!) has some great defaults to make your title tags of your internal pages, blog posts, etc. get optimized right away. Some people might change these settings, I keep them as-is.
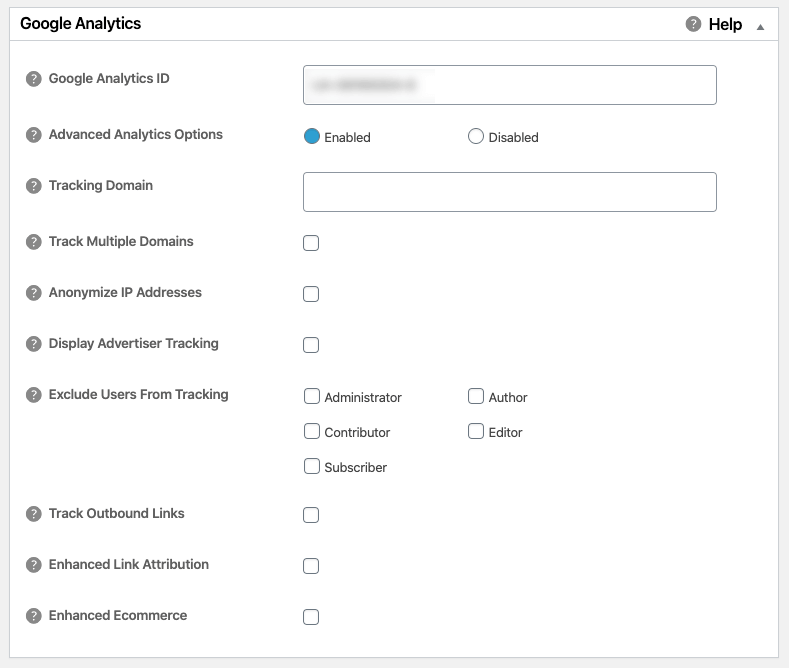
Next up is Google Analytics, as you can see there are tons of things you could configure here but like I said above, this is a quick weekend build so I’m just putting in my Google Analytics ID and moving on. If you want to read more about how to tweak all the Google Analytics settings, go nuts in this deeper dive here.
And that’s about it. Are there more things you can do to optimize All-In-One-SEO-Pack, absolutely. That being said, what I really like about this plugin is that you can install it (for free) and within two minutes it’s working its magic.
Okay, that’s it for now, I’m spacing these posts out because I think my readers would get annoyed if I just wrote about my weekend development project for five days in a row so stay tuned for Part 4 coming up on Saturday where I’ll cover the initial pages and posts I created.
Of course, the site is live now so if you want to get a look at it, feel free to head on over to TagManager.com to see what it looks like. Yes, it’s not pretty, but I built it in about three hours in a weekend. Over the coming weeks I’ll be doing things to turn it into a full-fledged blog and start tracking search rankings, revenue, and all the fun stuff that comes with a developed site. Stay-tuned and thanks for reading!